Return to home... |
Within Toon Boom Harmony, each layer has four distinct sub-layers; line-art, colour-art, overlay and underlay sub-layers. You are able to divide your artwork into different sections, without having to create separate drawing elements.
Benefits of art layers include:
Art layers can be bitmap or vector, and can be set independent of one another. If you, for instance, wanted a bitmap colour-art, but wanted a vector outline, that is possible!
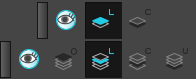
You can switch between which art layer you are drawing on, by finding the Art layer toolbar (usually found within the Camera view and Drawing view panels), and by clicking the relevant art layer.

By default, Harmony only has line art and colour art enabled. To enable overlay and underlay art layers, within your Preferences under the Advanced tab, enable the Support Overlay and Underlay Arts option.

It is worthwhile to enable this option, as you then gain more art layers, that you don't necessarily have to use for every drawing element.
Within the Camera view, by default you will see all the art layers at once.
If you would like to focus on the currently selected art layer, you can select the Current Drawing On Top option at the bottom of the camera view. This will hide the art layers not currently selected.

If you have this option enabled, to show the other art layers, you must select the Preview All Art Layers option within the art layer toolbar.

The Drawing view is opposite to the camera view. Within the Drawing view, you will only see the art layer you currently have selected. To show the other art layers, you must select the Preview All Art Layers option within the art layer toolbar.
Some tools support editing multiple art layers at once. Within your Tool Properties window, there will be a button called Apply to Line and Colour Art, which, when selected, will allow you to edit all art layers at once. This will apply the action you apply to all art layers.
(Note that although the button says Apply to Line and Colour Art, it will also apply to your overlay and underlay art layers.)
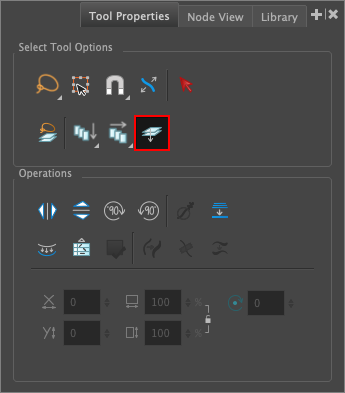
Tools that support editing multiple art layers at once include the Select tool, Cutter tool, Contour editor tool, et cetera.
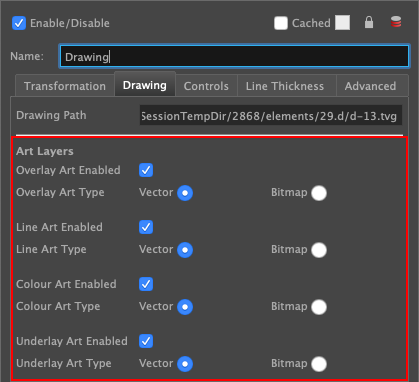
You can stop the art layer from appearing within your render by disabling the art layer from your drawing elements layer properties. Right click on your layer, select Layer Properties and enable/disable the relevant art layer.
Within your node view, you are able to use different nodes to isolate certain art layers. There are four individual nodes for each art layer; the Overlay-Layer node, Underlay-Layer node, Line-Art node and the Colour-Art node, which all isolate the drawing to the relevant art layer.

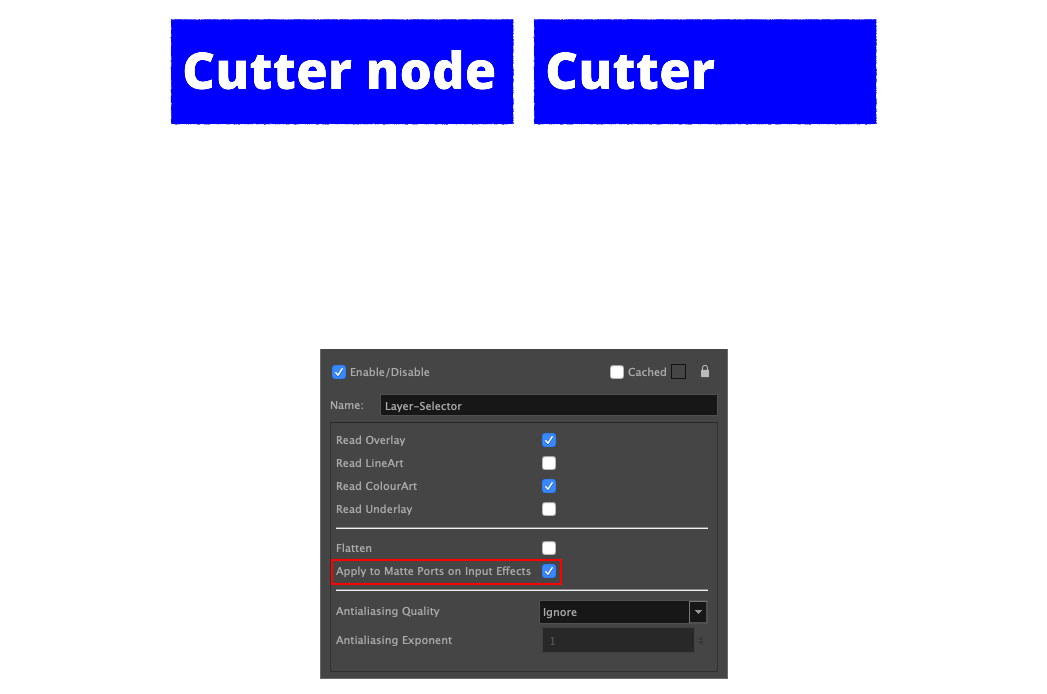
There is also the Layer-Selector node to allow you to enable/disable multiple art layers at once.

Within these nodes, there are a few different options:
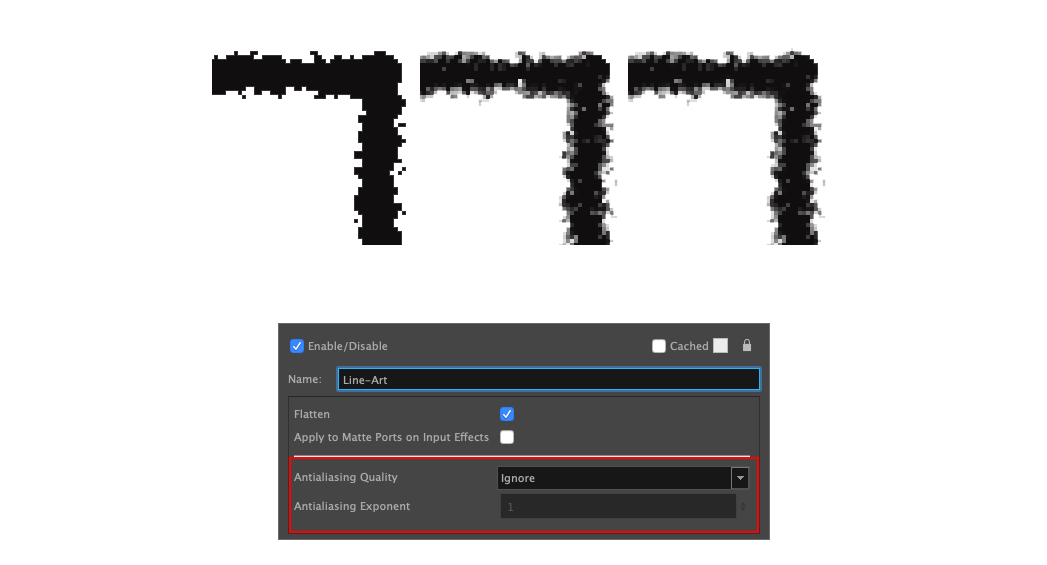
Flatten: This option will remove any parts of the drawing that are being overlapped by another (if the node is applied to a composite). Note that this option will only show the correct result in the render view, not the OpenGL view.

Apply to Matte Ports on Input Effects: When using one of the above nodes below a Cutter node, it will only apply the sublayer option to the Image input and not the Matte input drawings. By enabling this option, it will apply the cutter to both the Image input and the Matte input.
Antialiasing: Antialiasing improves the smoothness of edges, but is more taxing to process. Ignore will use the default anti-aliasing value from drawing element itself.
Antialiasing exponent: If the above option is set to anything but Low, this affects the distance from it looks at to anti-alias the edges. Higher values result in sharper edges.
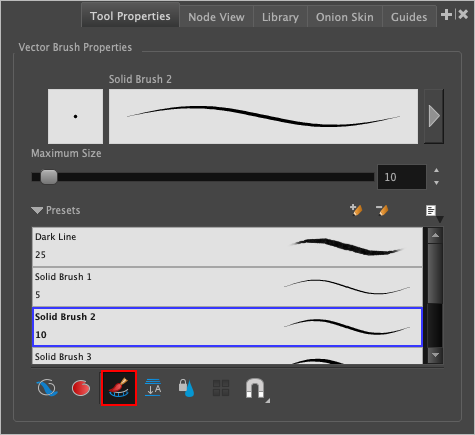
If you want to create the colour art strokes at time of drawing the line, enable the Automatically Create Colour Art within the brush and pencil Tool Properties windows. This option only works if you are currently drawing on the line-art layer.
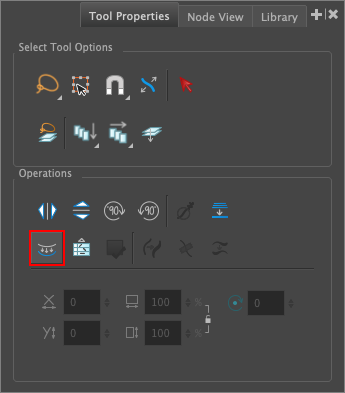
With line-art selected, whether that be a pencil stroke or a brush fill, you can use the Create Colour Art from Line Art button. This is found either within your Tool Properties window (if the Select tool is active), or within the Camera/Drawing View toolbars.
(Note that by default, this will only allow a selection on the line-art art layer and will not apply if the selection is on any other art layer.)
(Also note that if you are using this button, the destination art layer must be a vector art layer. The source art layer, or in other words the line art, can be bitmap or vector. The destination, where it puts the strokes for the colour art, must be vector.)

To get more granular control, you can Shift+Left click the button to gain more configuration options.

The three below options only affect the colour art when Use rendered version of the drawing is selected:
Use rendered version of the drawing: This option renders the drawing and then vectorizes it, and uses this information to calculate the position of the center-line. This is helpful for textures that have holes within, such as the Striped Ribbon brush.
Maximum resolution for rendered image: This refers to the above option, rendering a higher resolution image to base it's colour art from.
Threshold for rendered image: This declares the grey value that is used to calculate "solid" lines.
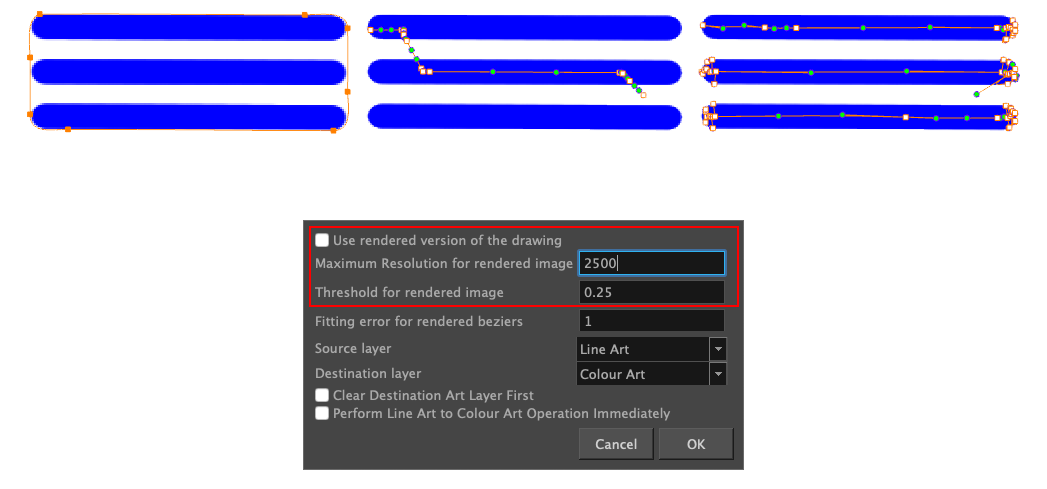
The below options affect any colour art fill creation:
Fitting error for rendered beziers: This option tells Harmony how smooth the colour art should be. The higher the number, the less precise the colour art zone is in relation to the line art, thus creating a smoother colour art fill (as it uses less vector points).
Source layer and Destination layer: These allow you to select the layers that are being used; source layer tells Harmony the art layer the line-art is on, whilst destination layer tells Harmony where the colour art fill should be created.
Clear destination art layer first: This will clear everything from the destination art sublayer before creating the fill.
Perform line art to colour art operation immediately: this will perform the Create colour art from line art action once the OK button is pressed. With this deselected, the button will be configured with your new options, but it will not actually perform the action.
If you would like to see the above settings in this window with examples, please watch the below video:
Although this is not an article about creating an auto-patch system, art layers are heavily used in the creation of an auto-patch. Please watch the below video by Onion Skin to learn more:
Name of shortcut |
Keyboard Shortcut |
Apply Tool to Line and Colour Art (for selection tools) |
Shift + Q |
Auto-Create Colour Art from Brush (includes pencil tool) |
Shift + F2 |
Create Colour Art from Line Art |
* |
Preview Line and Colour Arts (toggles |
P |
Switch to Line Art/Colour Art (swaps between line art and colour art layers) |
L |
Switch to Overlay/Underlay Art (swaps between overlay and underlay layers) |
: |
That concludes this piece on art layers, and how they work.
Return to home... |