Return to home... |
Below is an interactive Tool Properties window that will allow you to see all the options for the select tool. Hover over a button to view what it does, and click to be taken to that portion of the article.
Note that on mobile, at least for now, you can only tap to see the tooltip, and cannot jump to that portion of the article. Sorry! Use the contents buttons above to jump to the relevant section.
The Contour Editor is designed around allowing you to edit the vector points of an artwork. This includes their position, scale, rotation, along with their bezier curves. It specifically works on vector layers, and does not work on bitmap layers or artwork.
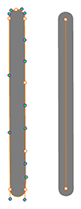
To start, let's describe what "vector" art means. Vector artwork is made up of points (or vertices). Lines and fills are drawn from these points, which is why we do not lose quality when zooming in or scaling vector artwork. Points have bezier handles that tell Harmony how to curve that line. Finally, there's contours, which is the term used for the lines that connect points together. As such, the Contour Editor tool is designed around allowing you to edit the vector contours (the vector lines) by editing the points and bezier handles.
Brush strokes are represented by points on all side to represent a fill, whilst pencil strokes are represented by the centre line.
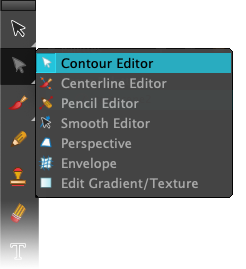
To use the Contour Editor tool, go to your Tools toolbar and find the Contour Editor tool. You may have to hold down your mouse button to show more options.
To show the vector points of a fill or line, you can click on the edge of that fill or line. You can also use your mouse to drag a selection over any edge; if no points are present within that selection area, none will be selected but it will show the vector points.
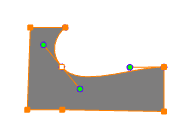
You can select vector points by creating a selection with your mouse cursor. You can deselect any selection by clicking in an empty area of the orange line around the object. You can add points to the selection by holding Shift and clicking on points, or holding Shift and creating a selection.

To create a bezier handle, first show the vector points, and then hold Alt and drag on any point. This will create bezier handles.
These handles will by default be linked. To delink them, hold Alt whilst modifying a bezier handle to delink them. To relink them, bring them to being together again (in a straight line), and they will be controlled as linked bezier handles again.
To create new points, hold Ctrl (Cmd on macOS) and click on the orange vector line. To clear points, you can either select and delete them, or nudge the line to optimise the shape.

As said above, you can drag on a line to nudge (or move) a contour line. Drag from the middle of a line, and this will allow you to change the shape of a line. This will affect the nearby points bezier handles. Note that where you drag the line from will affect how this works; if you drag too close to a corner, it will move that entire corner. Additionally, if a line is moved to an angle that matches another, it will link up the bezier handles automatically.
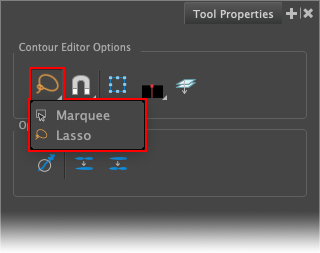
Lasso/Marquee: You can set your selection shape to either be a lasso (a freeform shape drawn via your mouse), or a marquee (a box drawn by your mouse).
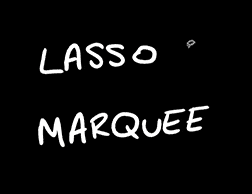
You can also hold Alt to temporarily switch to the other selection shape (if lasso is selected, holding Alt will create a marquee shape, and vice versa).
Hold your left mouse button down on the Snap button to enable snapping. This will snap your selection to the relevant options. The below settings can all be toggled independently, meaning you can have multiple snap settings on and off at once. To enable or disable a snap setting, hold down on the button and select the option; this will toggle it on and off.
Note that all snapping occurs only on the point currently at the mouse cursor; if multiple points are selected, those are not involved at all with snapping unless currently under the mouse cursor position.
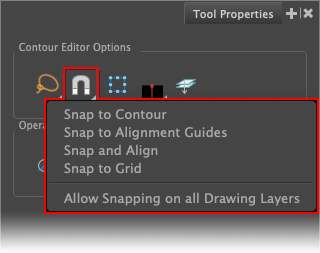
Snapping options include:
Snap to Contour: Snaps the currently selected point at the mouse cursor to any nearby points as you drag your mouse closer.
Snap to Alignment Guides: Snaps the currently selected point to alignment guides. Learn more about alignment guides here.
Snap and Align: Snaps the currently selected point to an imaginary bounding box around every object (snaps to edges and centre of these bounding boxes).
Snap to Grid: Snaps the currently selected point to the field guide grid, found in the Camera View or Drawing View toolbars.
Allow Snapping on all Drawing Layers: this option tells Harmony whether to snap to only what is found on the currently selected drawing layer, or whether it should snap to anything that’s currently showing. This is affected by the current display node, and what is visible and unlocked.
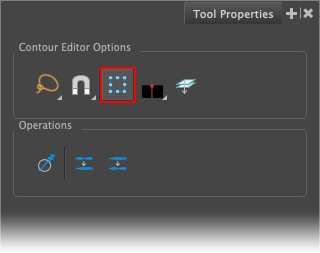
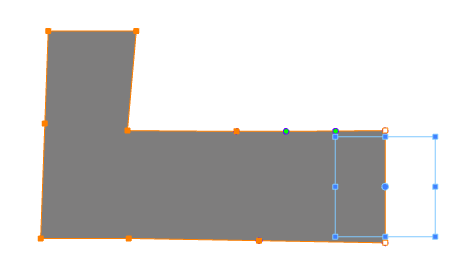
To be able to scale and rotate multiple points at once, enable the Show Controls button within the Tool Properties window. By selecting points, it will show a blue box for adjustment of scale and rotation. This does not change how you move points; you still move points by clicking on them and dragging.
To scale the points, drag on any of the blue squares in the resulting blue box and drag to scale.
To rotate, move your mouse off of the edge of the blue box at any corner to rotate.
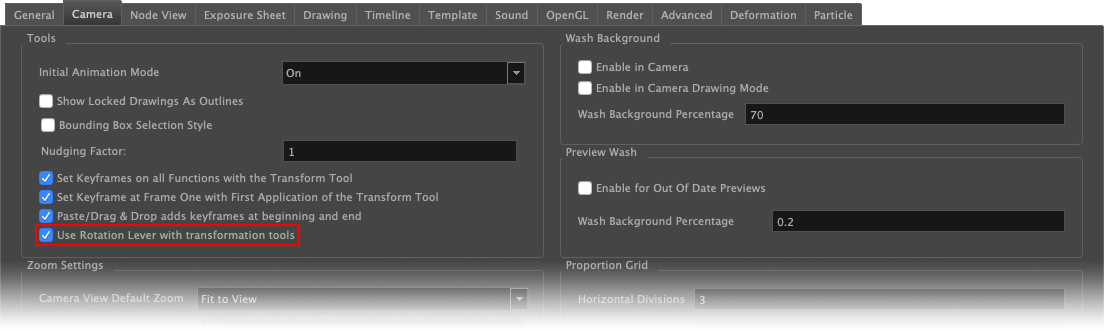
If you don’t like your rotation being from the corner, you can enable a rotation lever within Harmony Preferences > Camera > Use Rotation Lever with Transformation Tools. This instead gives you a lever at the side to rotate via.
To adjust the pivot point of the scale/rotation, move the box by dragging the centre circle within the blue box. This pivot point will apply until you change the points selected or deselect.
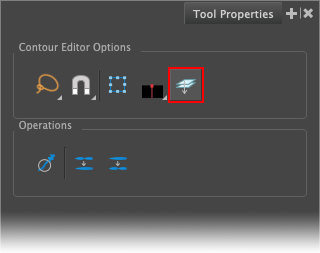
By default, if you are utilising art layers within your layer, you can only select vector points on the current art sublayer. To be able to edit all art layers at once, click the Apply to Line and Colour Art button within the Tool Properties panel. This button will affect all art layers, including overlay and underlay art layers if enabled. Learn more about art layers here.
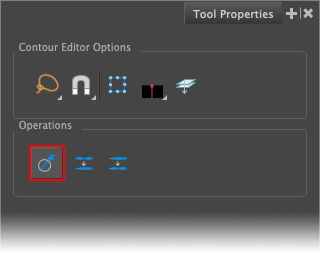
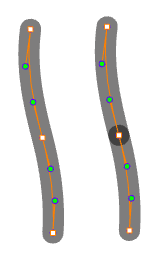
By clicking the Smooth button, Harmony will take the vector points and try to smooth them out. This reduces the amount of contour points on a brush stroke, or reduces the amount of centre points on a pencil line, thus smoothing out the shape. This is the same option as going Drawing > Optimise > Smooth.
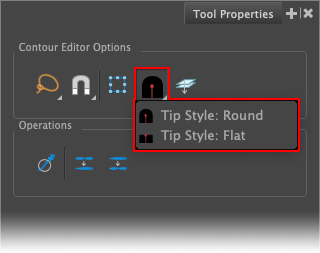
By clicking a portion of a line, you are able to delete it. Tip style refers to how the ends of the resulting lines after deleting part of a full line look. It can either be Flat or Round.
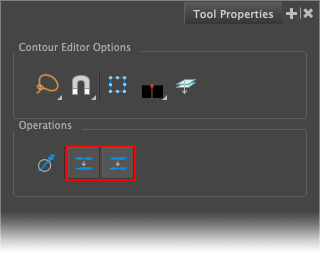
With points on a pencil line selected, you can split them into separate objects via the Split Pencil Lines button. Within the Contour Editor, it will still treat them as having linked bezier handles, but note that they are separated when using tools like the Select Tool. Learn more about the Select Tool here.
If two points are overlapping, then the Join Pencil Lines button will turn those pencil lines into one line. Note that they have to be overlapping and so if you find this button does not work, ensure the points are overlapping (easiest way is to enable Snap to Contour and snap the points together) and try again.
General |
Keyboard Shortcut |
Contour Editor Tool |
Alt+Q |
Show/Hide Rotation and Scale Options |
Alt+F5 |
General |
Keyboard Shortcut |
Apply Tool to Line and Colour Art |
Shift+Q |
Smooth |
Alt+Shift+S |
Join Pencil Lines |
Alt+Shift+J |
Split Pencil Lines |
Alt+Shift+K |
Snapping |
Keyboard Shortcut |
Snapping |
Not assigned |
Snap and Align |
Ctrl+Alt+, |
Snap to Alignment Guides |
Not assigned |
Snap to Contour |
Ctrl+Alt+; |
Snap to Grid |
Ctrl+Alt+' |
That concludes this piece on the Contour Editor, and the additional features within.
Return to home... |