Return to home... |
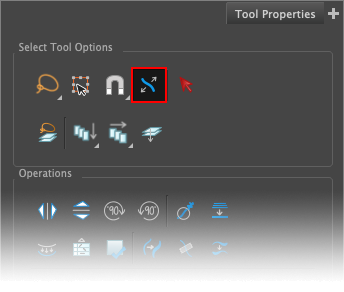
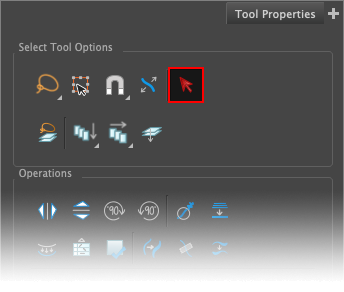
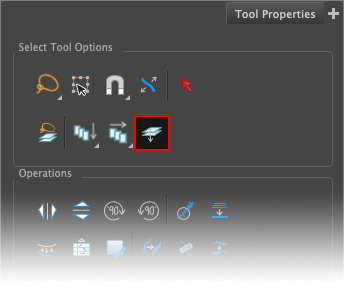
Below is an interactive Tool Properties window that will allow you to see all the options for the select tool. Hover over a button to view what it does, and click to be taken to that portion of the article.
Note that on mobile, at least for now, you can only tap to see the tooltip, and cannot jump to that portion of the article. Sorry! Use the contents buttons above to jump to the relevant section.
One of the most common tools you use within Toon Boom Harmony is the Select Tool; this tool specifically selects the drawing data within a drawing substitution. This tool also has a bunch of additional features within to help you with production.
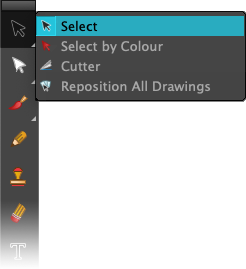
To use the selection tool, go to your Tools toolbar and find the Select Tool. You may have to hold down your mouse button to show more options.
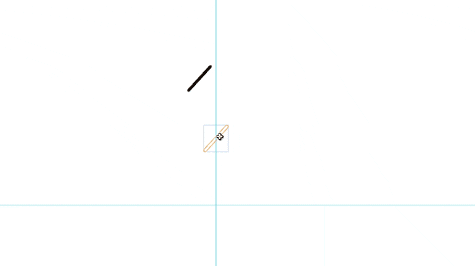
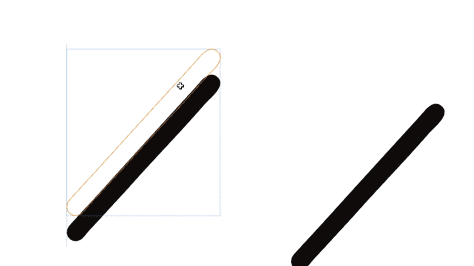
To select an element, either click on a drawing, or hold down the mouse button and select the area you want to select.

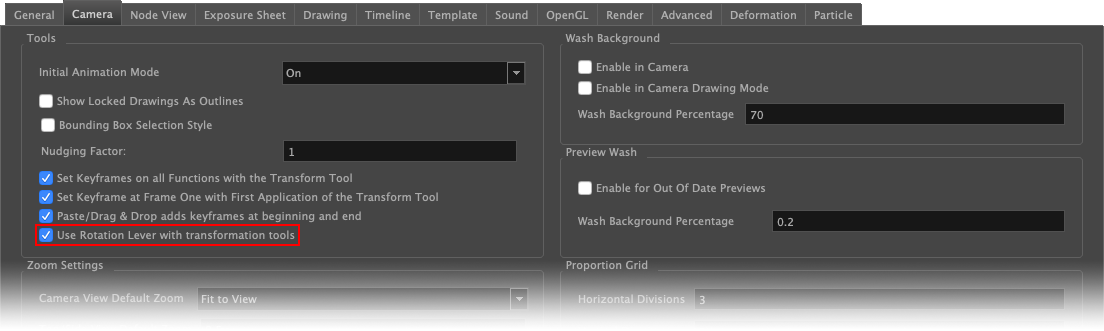
If you don’t like your rotation being from the corner, you can enable a rotation lever within Harmony Preferences > Camera > Use Rotation Lever with Transformation Tools. This instead gives you a lever at the side to rotate via.
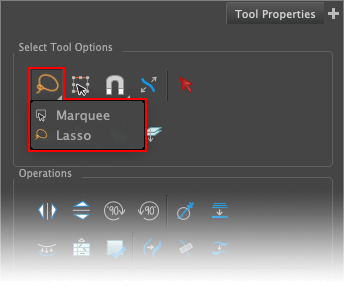
The following settings are found within the Tool Properties panel when the selection tool is active.
Lasso/Marquee: You can set your selection shape to either be a lasso (a freeform shape drawn via your mouse), or a marquee (a box drawn by your mouse).
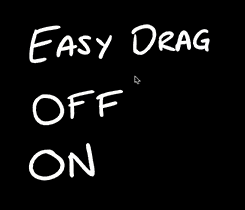
Easy drag: When using the select tool, you must click and drag on any fill or stroke to move it. If you drag where there is no fill/stroke, the selection will be deselected. Via the easy drag option, this makes it so rather than having to click and drag on any fill, you can drag anywhere within the selected bounding box.

Permanent selection: This creates an area that selects anything within, that works across frames. This area will not disappear until you redraw the shape. This allows you to edit a selection area across frames, and keep your selection even after swapping to another tool.
The selection is present whether you:
Hold your left mouse button down on the Snap button to enable snapping. This will snap your selection to the relevant options. The below settings can all be toggled independently, meaning you can have multiple snap settings on and off at once. To enable or disable a snap setting, hold down on the button and select the option; this will toggle it on and off.
These settings include:
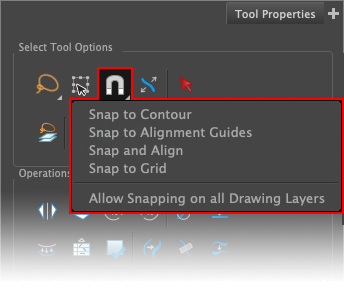
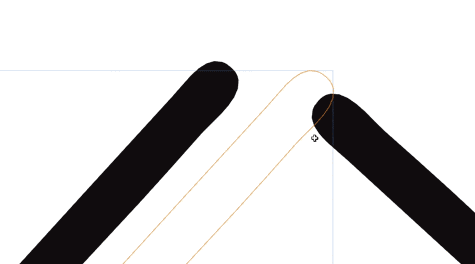
Snap to Contour: this snaps your current selection to nearby points on your artwork, and is designed around snapping parts of your artwork together. If moving a line, it will attempt to snap to it's previous position. This is affected by where you drag it from; if the object is dragged from the middle, it will attempt to snap to where you drag it from, whilst if it is dragged from the edge it will snap from there.
Snap to Alignment Guides: if you have alignment guides turned on, it will snap your selection to the alignment guide. This is specifically in reference to alignment guides found within the Alignment Guides toolbar, and not the guides found in the Windows > Guides window. Learn more about alignment guides here.
Snap and Align: imagine every one of your drawings has a rectangular bounding box around them. Snap and align will snap your selection to the edges and centre of these bounding boxes.
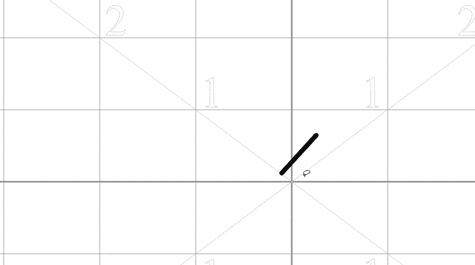
Snap to Grid: Go to View > Grid > Show Grid, or enable the grid via the button within the Camera/Drawing View toolbars, to enable the grid. This will show the field guide grid. This snaps the current selection to that grid.

Allow Snapping on all Drawing Layers: this option tells Harmony whether to snap to only what is found on the currently selected drawing layer, or whether it should snap to anything that’s currently showing. This is affected by the current display node, and what is visible and unlocked.
If this option is selected, it will scale the pencil line thickness with it. If deselected, the vector points get bigger but the pencil thickness will stay the same.
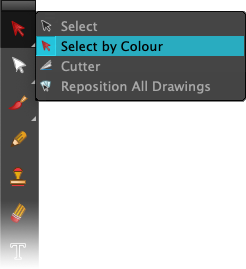
If you have a colour within your swatch palette that is used across the drawing, you can use the Select by Colour option to select every use of that colour. This will select all fills and pencil lines that use that swatch colour. It selects every colour with that specific colour swatch, and does not select different swatches with the same colour values. Note that Select by Colour only works with vector artwork.
This option also exists within the Tools toolbar, by holding down on the Select tool and selecting Select by Colour.
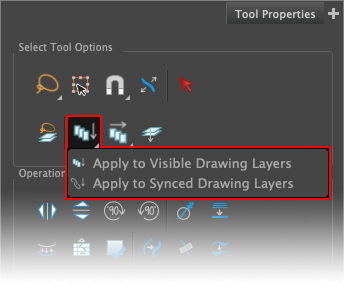
Apply to visible drawing layers: This option allows you to apply your selections to any layer that is currently displayed on-screen. This is affected by the current display node, and the layers visibility. To select this option, hold down the button and select the Apply to visible drawing layers button.
Apply to synced drawing layers: If you have multiple layers that have their timing charts synced, then this option allows you to affect the drawings on all layers with a synced timing. To select this option, hold down the button and select the Apply to synced drawing layers button.
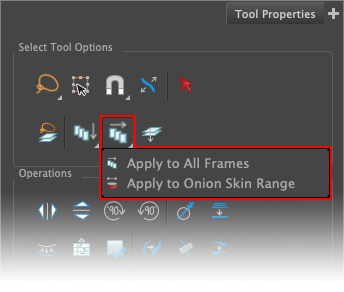
If you would like to select the drawing data over a set of frames, use the Apply to All Frames and Apply to Onion Skin Range options.
Apply to All Frames: Allows you to select any and all drawing data in any and all drawing substitutions currently on the timeline.
Apply to Onion Skin Range: Allows you to select any and all drawing data that is on the drawing substitutions present within the current onion skin range. Click here to learn more about the onion skin tool.
Note that although you can see the other frames with this option, you must still drag the current frames fills/strokes, otherwise it will deselect.
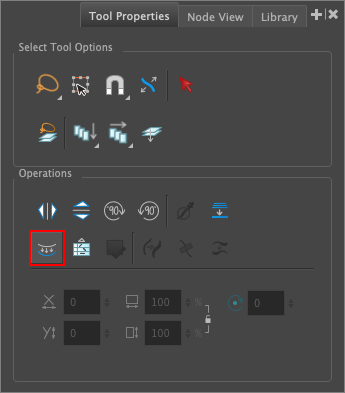
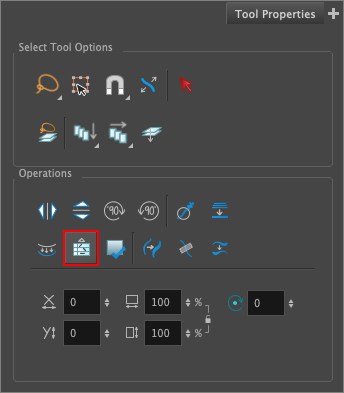
By default, if you are utilising art layers within your layer, you can only select fills/strokes on the current art sublayer. To be able to edit all art layers at once, click the Apply to Line and Colour Art button within the Tool Properties panel. This button will affect all art layers, including overlay and underlay art layers if enabled. Learn more about art layers here.
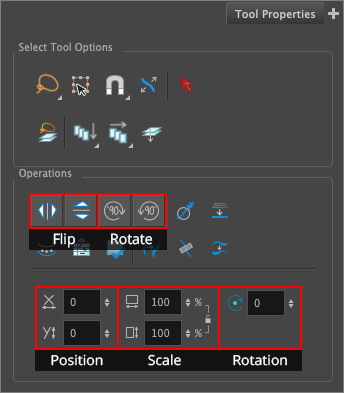
Flip: Flip your drawing data horizontally and vertically via the flip buttons.
Rotate 90°: Rotate a selection 90 degrees by clicking the rotate buttons, clockwise or anti-clockwise.
Rotate input box: To give it a specific number to rotate, use the input box to type in a number, or drag the ↕ button vertically.
Position: To move an object via a certain number of pixels on-screen, use the input boxes for X and Y to move it on the X-axis (left and right) and the Y-axis (up and down). Drag the ↕ button vertically to change the number, or type in a number directly.
Note that the number you input for the position value is affected by the Camera/Drawing view zoom level. This is because the number represents how many pixels on-screen it moves; being zoomed out means a pixel on-screen is bigger on the stage, whilst being more zoomed in means a pixel is smaller on-stage.
Scale: To scale an object up and down, type in a number or drag the ↕ button vertically to adjust. The numbers represent percentages, 100% being the original scale, 50% being half the size, and 200% being double the size. Click the lock icon to the right to ensure the width and height remain proportional (both the width and height stay the same aspect ratio).
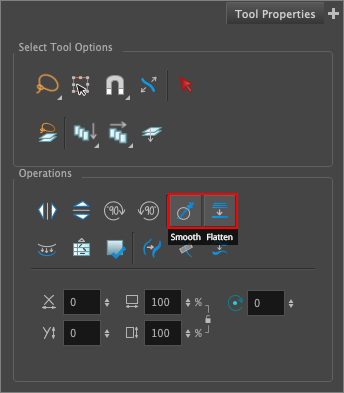
By clicking the Smooth button, Harmony will take the vector points and try to smooth them out. This reduces the amount of contour points on a brush stroke, or reduces the amount of centre points on a pencil line, thus smoothing out the shape. This is the same option as going Drawing > Optimise > Smooth.
By default, using the drawing tools will create a new object every time you draw a new line or stroke (as the Auto flatten button is disabled within the brush or pencil Tool Properties window). If you want to merge these fills/strokes into one object, the Flatten button will do so.
If you are using art sub layers, and are drawing your line art onto the line art sublayer, this button by default will take your line art and create a stroke on the colour art layer. There are additional options when you Shift + Left Click this button. You can find out more about art layers and this button in particular here.

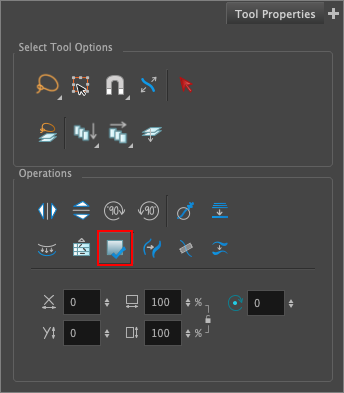
The Distribute to Layers button will take each individual item that’s selected, all selected individual strokes or fills, and will create a brand new layer for each.
If you have a fill with a gradient colour swatch selected, you are able to click the Store Colour Gradient button to store the gradients inner position. You are able to see the gradient via the Edit Gradient/Texture tool; this is the information that Harmony is storing.
Once clicked, within your tool of choice (for example the brush tool), use the Use Stored Colour Gradient button to reference the position saved from the above button.
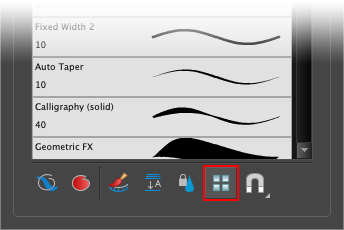
For selections that have additional settings that you can change after the fact, such as pencil strokes and text objects, your additional settings will appear at the bottom of your Tool Properties window. For a pencil stroke, you are able to edit the texture and shape of pencil lines after drawing them.
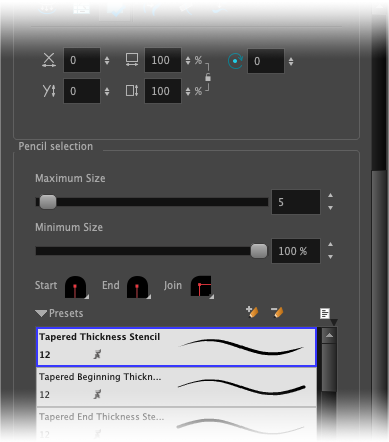
There are also additional pencil buttons, which are:
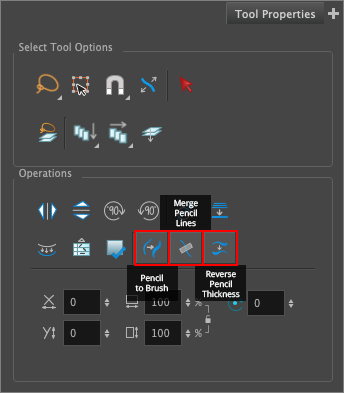
Pencil to Brush Stroke: To turn any selected pencil line into a brush stroke/fill, click the Pencil to Brush Stroke button within the Tool Properties window.
Merge Pencil Lines: If you have two or more pencil lines where the vector points are very close to one another, you can use the Merge Pencil Lines button to merge the lines into one. Depending on how close the vector points are, depends on whether it will merge. If it does not merge, the easiest way to do so is to use the Contour tool to move the points to be on top of one another, and try the tool again.
Reverse Pencil Thickness: This option does not do what it sounds like it does. This option takes the thickness of one end of the line and applies it to the other side of the line, and vice versa. Thus, if your pencil line has both ends thick and the middle thin (in a U shape), it will still be a U shape after clicking the button (see image below).
This option does NOT take thin areas and make them thick, and vice versa.
General |
Keyboard Shortcut |
Select Tool |
Alt+S |
Select by Colour Tool |
Not assigned |
Select Tool Options |
Keyboard Shortcut |
Select All |
Ctrl+A |
Create Drawing from Drawing Selection |
Ctrl+F9 |
Invert Selection |
Ctrl+Shift+I |
Remove Art Outside Selection |
Shift+Backspace or Shift+Delete |
Permanent Selection |
Ctrl+Shift+P |
Apply Tool to to Visible Drawing Layers |
Not assigned |
Apply Tool to to Synced Drawing Layers |
Not assigned |
Apply Tool to All Frames |
Alt+A |
Apply Tool to Onion Skin Range |
Not assigned |
Apply Tool to Line and Colour Art |
Shift+Q |
Snapping |
Keyboard Shortcut |
Snapping |
Not assigned |
Snap and Align |
Ctrl+Alt+, |
Snap to Alignment Guides |
Not assigned |
Snap to Contour |
Ctrl+Alt+; |
Snap to Grid |
Ctrl+Alt+' |
Operations |
Keyboard Shortcut |
Flip Horizontal |
4 |
Flip Vertical |
5 |
Rotate 180 |
Not assigned |
Rotate CW |
Ctrl+7 |
Rotate CCW |
Ctrl+9 |
Smooth |
Alt+Shift+S |
Flatten |
Alt+Shift+F |
Create Colour Art from Line Art |
* |
Distribute to Layers |
Not assigned |
Pencil shortcuts |
Keyboard Shortcut |
Scale Pencil Line Thickness |
Not assigned |
Convert Pencil Lines to Brush Strokes |
& |
Merge Pencil Lines |
Not assigned |
That concludes this piece on the Select Tool, and the additional features within.
Return to home... |